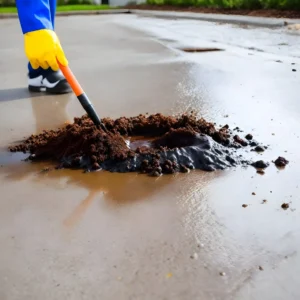
If you’re reading this, chances are you’ve just experienced one of the most dreaded enemies of any driveway or garage floor – a car oil spill on concrete. Don’t panic! While a fresh oil slick might seem like a looming disaster, with the right information and a little elbow grease, you can emerge victorious and leave your concrete pristine.
This guide equips you with the essential steps on how to clean up oil spills on concrete, ensuring a safe and effective cleanup process. We’ll delve into the tools you need, different approaches for fresh and set-in spills, and some handy tips to prevent future mishaps.
Essential Tools for Oil Spill Cleanup
Before diving headfirst on how to clean up oil spill on concrete, gather your arsenal:
- Safety First: Safety glasses and gloves are crucial to protect yourself from oil contact. Opt for nitrile gloves, which offer better oil resistance than latex gloves.
- Containment: Ultra Absorbent Boom Socks are your best friends for this battle. These long, sausage-shaped socks soak up oil like a sponge, preventing it from spreading further.
- Absorbent Materials: Stock up on spill absorbent materials like kitty litter, sawdust, or baking soda. These will further absorb the oil and aid in the cleaning process.
- Cleaning Materials: Dish soap, a stiff scrub brush, and a bucket of hot water are essential for tackling the remaining oil residue.
- Disposal: A sturdy trash bag or container is needed to dispose of the oil-soaked materials responsibly.
Pro-Tip: Consider keeping a spill kit readily available in your garage for any oil-related emergencies.
Fresh Oil Spills: A Swift and Effective Response
The sooner you address a fresh oil spill, the easier the cleanup will be. Here’s the battle plan:
- Contain the Spill: First things first, prevent the oil from spreading further. Deploy your trusty Ultra Absorbent Boom Socks around the perimeter of the spill. These socks will act as a barrier, absorbing the oil before it can seep into cracks or contaminate surrounding areas.
- Blot Up the Bulk: Next, grab those absorbent materials. Generously cover the oil spill with kitty litter, sawdust, or baking soda. These materials will act like sponges, soaking up the bulk of the oil. Allow the absorbent material to sit for 15-20 minutes, letting it absorb as much oil as possible.
- Scrub and Rinse: After the initial absorption, it’s time to tackle the remaining residue. Put on your gloves and safety glasses. Mix a generous amount of dish soap in hot water to create a cleaning solution. Using the stiff scrub brush, attack the oil stain with vigorous scrubbing motions. Rinse the area thoroughly with clean water, ensuring all traces of soap and oil are removed.
- Repeat if Necessary: Depending on the severity of the spill, you might need to repeat steps 2 and 3. Be patient and persistent until the concrete is free of oil residue.
- Proper Disposal: Once the oil has been absorbed and cleaned, carefully gather the used absorbent materials and place them in a sealed trash bag. Dispose of the bag responsibly according to your local regulations.
Tackling Stubborn Oil Spills
If you’re facing a seasoned oil stain, fret not! While it might require a little more effort, with the right approach, you can still achieve a clean surface. Here’s how to handle set-in oil spills:
- Scrape Away Excess: If there’s any hardened oil residue on the surface, carefully scrape it away using a putty knife or a flat-edged tool. Be gentle to avoid scratching the concrete.
- Baking Soda Power: Baking soda can be a surprisingly effective weapon against set-in oil stains. Make a thick paste by mixing baking soda with a little water. Apply the paste generously onto the stain and let it sit for several hours, ideally overnight. The baking soda will help draw out the oil.
- Dish Soap Scrub: After the baking soda treatment, follow the same scrubbing and rinsing steps outlined for fresh oil spills (steps 3 and 4). You might need to apply more pressure and repeat the process a few times to remove the deeper oil.
- Commercial Degreaser (Optional): For particularly stubborn stains, consider using a commercial concrete degreaser. Always follow the product instructions carefully and ensure proper ventilation while using harsh chemicals.
Remember: When dealing with set-in stains, patience is key. Repeating these steps consistently will eventually lead to a clean concrete surface.
Preventing Future Oil Spills

Here are some wise tactics to minimize the risk of oil spills on your concrete:
- Regular Maintenance: Schedule regular oil changes for your car. Leaks and spills are often a result of overdue maintenance.
- Catch Drips: Place an oil drip pan under your car whenever it’s parked in the garage for extended periods. This will catch any minor leaks or drips before they stain your concrete.
- Mind Your Tools: Be mindful when using tools or containers that might leak oil. Place them on a protective mat or drip pan to prevent accidental spills.
- Proper Disposal: Never dispose of used motor oil down drains or on the ground. Take it to a designated oil recycling facility for proper disposal.
Victorious and Eco-Conscious
By following these steps and tips, you’ll be well-equipped to handle any oil spill situation on your concrete surface. Remember, acting swiftly and using the right approach are key to a successful cleanup.
A Champion for Sustainability: When cleaning up oil spills, prioritize eco-friendly methods whenever possible. Opt for natural absorbents like baking soda and kitty litter instead of harsh chemicals. Additionally, dispose of oil-soaked materials responsibly to prevent environmental contamination.
With a little knowledge and the right tools, you can transform yourself from a bystander to the Asphalt Avenger, conquering oil spills on concrete and leaving your driveway or garage floor spotless and protected. Now, go forth and conquer those pesky oil spills!
